Add Branches
Branches are added in ISP for the separate handling of ISP in different cities or areas. For precise control of customer handling branches are made. One ISP can only have a maximum of FIVE branches.
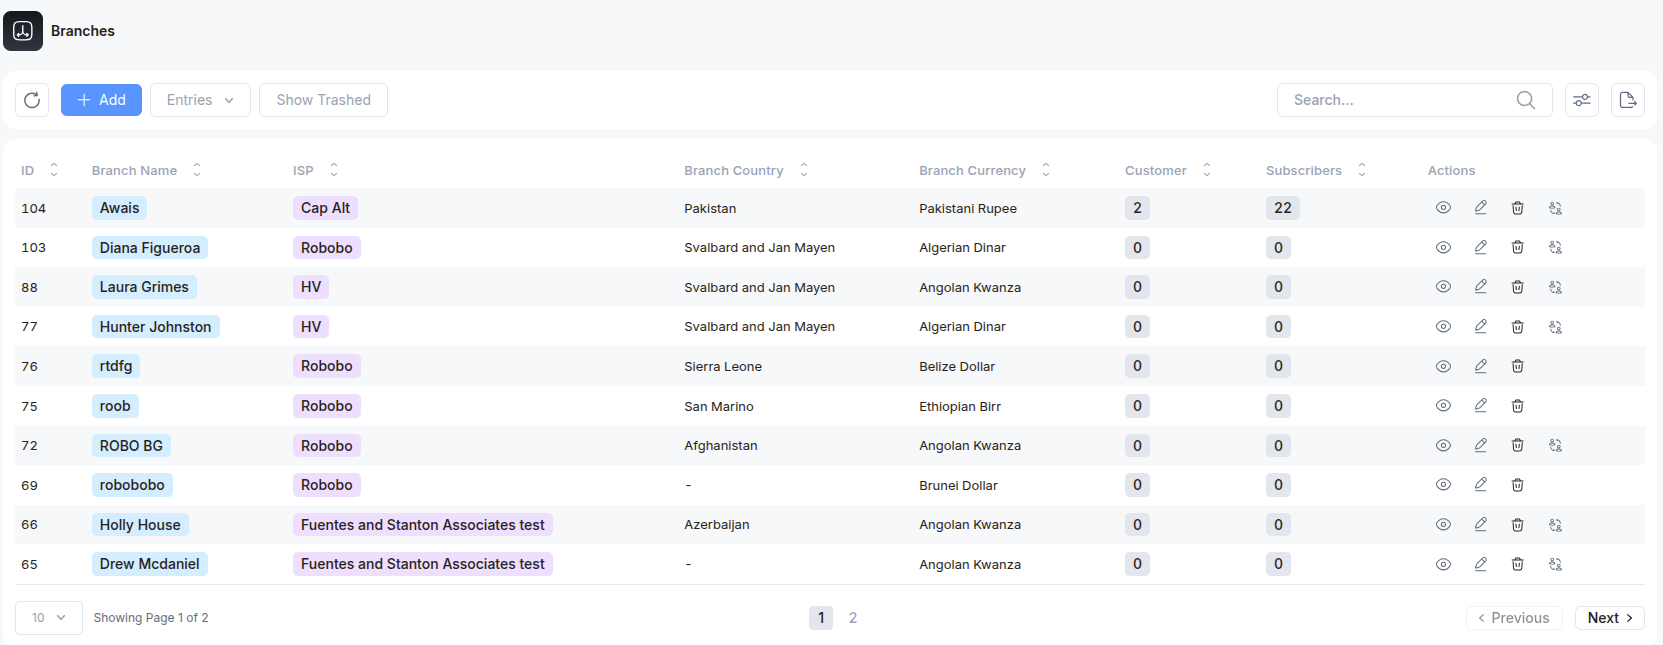
Click on the Branch button in the left panel.
The above interface appears. At this interface, Super Admin can:
-
View the ISPs Dataset and from them, SA can
-
Search
-
Sort
-
Ascending
-
Descending
-
-
Modify View
-
export dataset as PDF, dataset, Excel file, or can have a simple print too
-
Filter
-
-
View the details of the BRANCH from the dataset by clicking on the EYE button
-
Edit the BRANCH by clicking on the EDIT button
-
Delete the BRANCH by clicking the DELETE button and then CONFIRM it.
-
Switch to the branch account (i.e Enter the Admin mode)
Create a New Branch
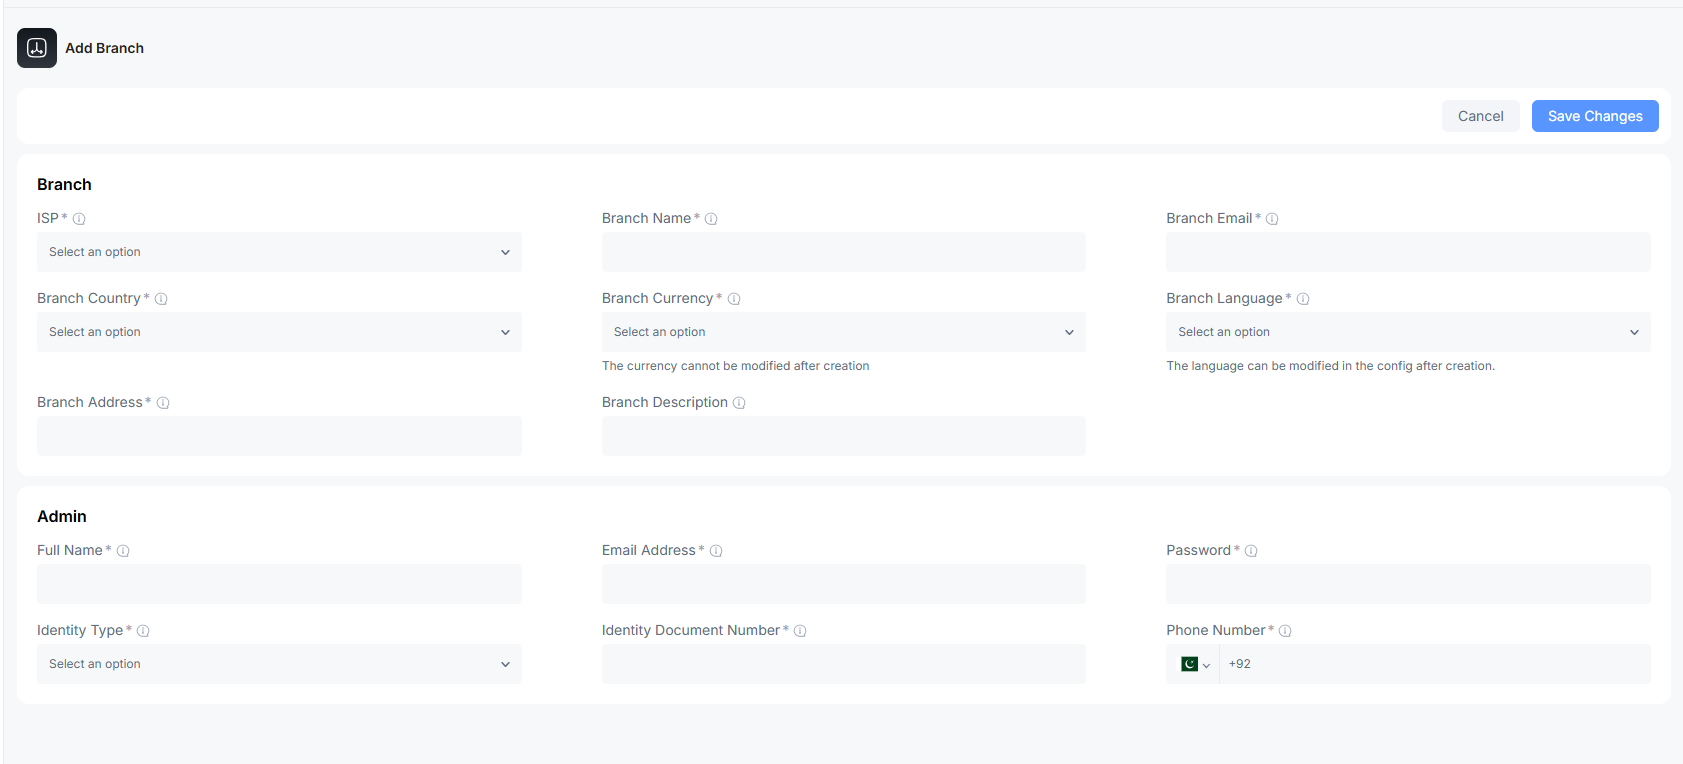
To add a branch to the ISP system, the form opens up
On the above interface, you need to provide:
BRANCH DETAILS
ISP: Select the ISP in which the branch is going to be created.
BRANCH Name: Name of the BRANCH in the Internet Service Provider
Branch Country: Select the country in which the branch is going to exist.
Branch Currency: Currency will be used for transactions inside the branch.
Branch Language: The language will be used in the system for the branch.
Branch Address: The physical address of the branch office.
ADMIN
The information is needed to create amd login in an admin panel
Full Name: The name of the person owning the branch.
Phone Number: The contact number of the Admin of the Branch, for later use.
Email Address: Email address of the Branch Admin for updates.
Password: The password to authenticate Admin for Admin’s mode login
Identity Type: Select the type of document used to verify the identity.
Identity Document Number: The unique identification number mentioned on the Identity Document
Click on the SAVE button to create the new BRANCH in the selected ISP with the given details.