Config
In configuration, ALT Radius provides 8 different modules to customize your CRM operation according to your own needs. The config section acts as a central control panel for ISP management. Here, you can add things to the system that are applied to other modules, such as date/timing format, and the whole software interface follows it.
The Config section sets the underlying rules and logic that control how the network and business will operate.
Here is a detailed section on how each section helps in system configuration.
General Settings
This is used for the general setting of software. It typically includes the overall setting of the system. Mainly, it has three subsections
1-Configuration Setting
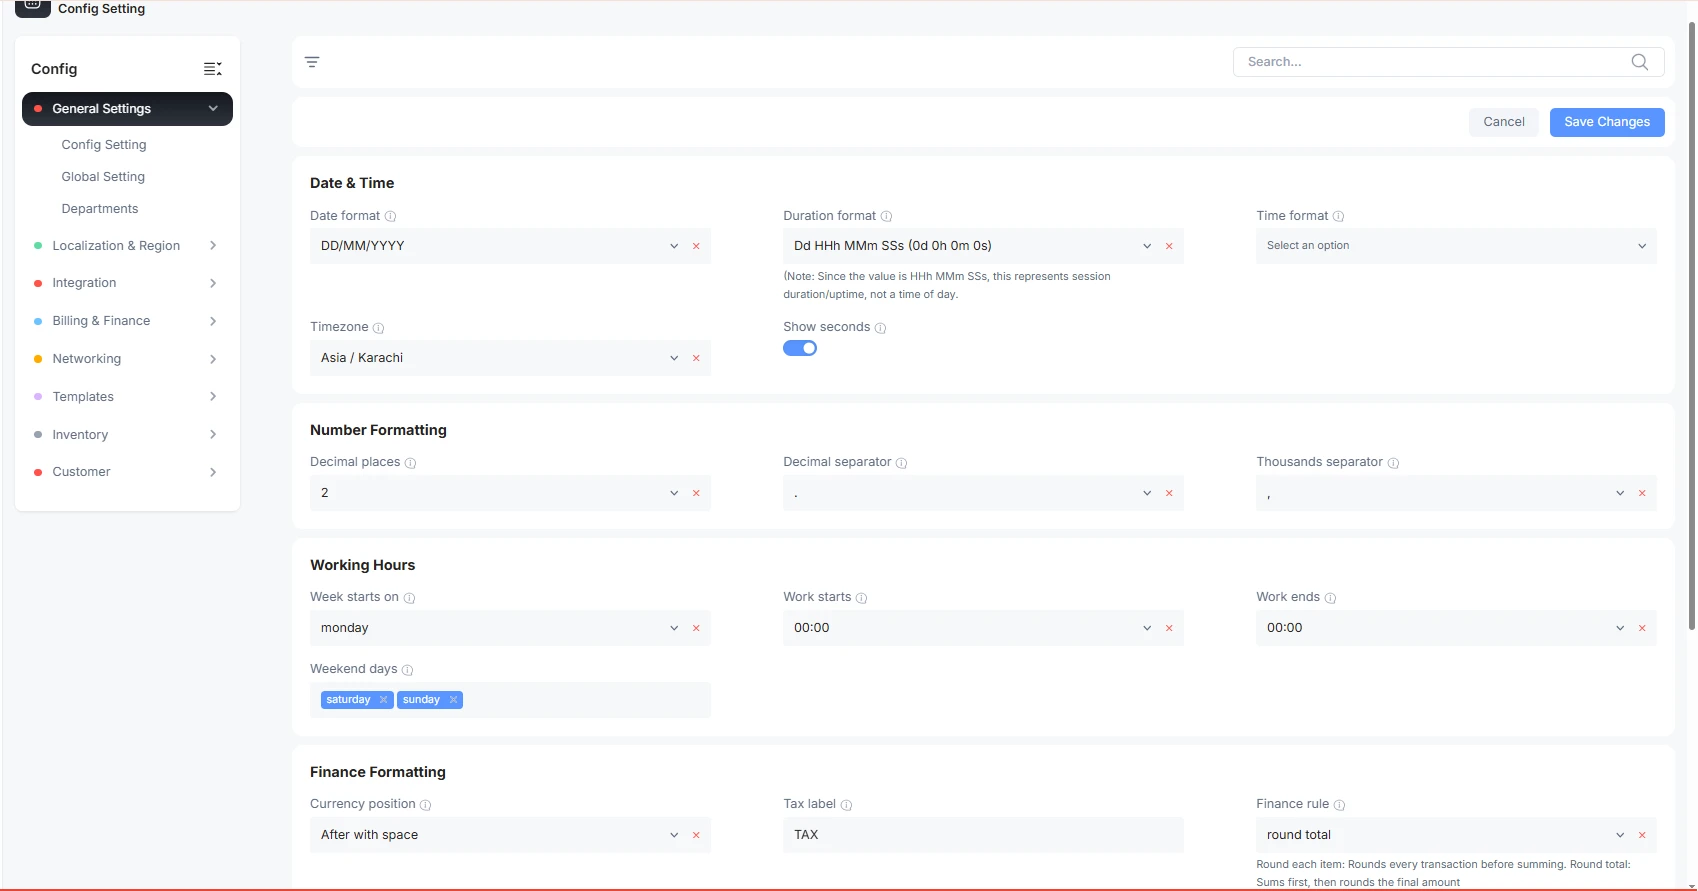
This includes
Date & Time settings:
Date Format: How the date format will be used throughout the software. By default, it is Day/Month/Year
Duration Format: The radius server will record the session time format for each customer session
Time Format: Either choose 12hr or 24hr time format for your system
Time Zone: The time zone according to your country
Show second: Activating this button will also display seconds in the time
Number Formatting:
Decimal Places: The number of decimal places you want to calculate and show how many decimal places.
Decimal separator: It shows what the decimal point will look like
Thousand operators: After the thousand unit, what comma will display
Working Hours:
Week start: The starting day of work. By default, it is Monday
Work starts: The official timing of business starts
Work ends: The official timing of business ends
Weekend days: By default, it is Saturday and Sunday; you can change according to your country or business requirements.
Finance Formatting:
Currency position: the currency symbol will be placed after or before the number
Tax Label: All taxes in the system will display as TAX, or you can change it
Finance Rule: Round off applies to each transaction or on total
File Naming:
Invoice prefix: The prefix name of the invoice when the admin downloads the invoice
Receipt prefix: The payment receipt prefix name when download in system
Quote prefix: Similarly, for the quotation prefix, while downloading
PDF Templates
Here, you can change the PDF templates.
Invoice: Choose a template for invoice generation when downloaded in PDF form
Customer Quote: Template for customer quote selection
Lead Quote: File template for sending to leads
Payment Receipt: Payment receipt PDF template for download
2-Global Setting
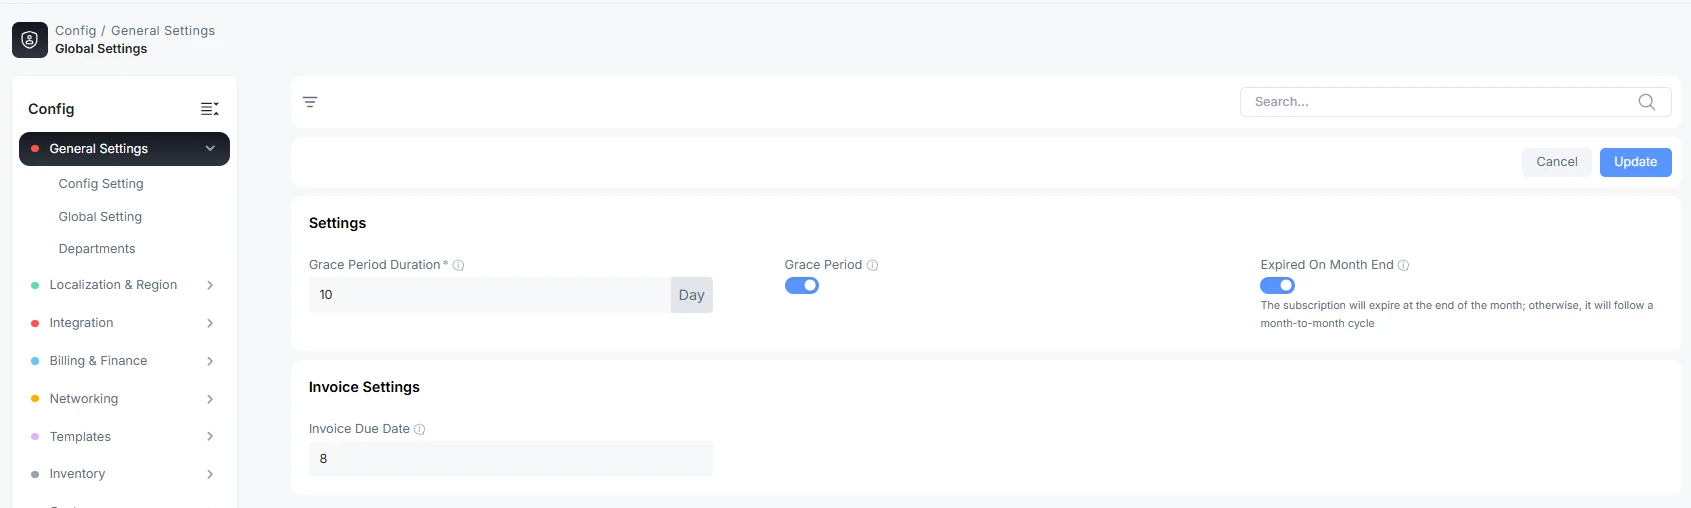
In a global setting, an ISP can decide how many grace periods should be given to a customer in case the payment is not made.
Grace Period Duration: How many days a customer can use the internet service after the due date of the invoice.
Grace period button: This will activate the grace period
Expired on Month End button:
Invoice due date: The number of days after the invoice is generated. The customer has to pay the bill before the due date. Otherwise, service will expire.
3-Departments
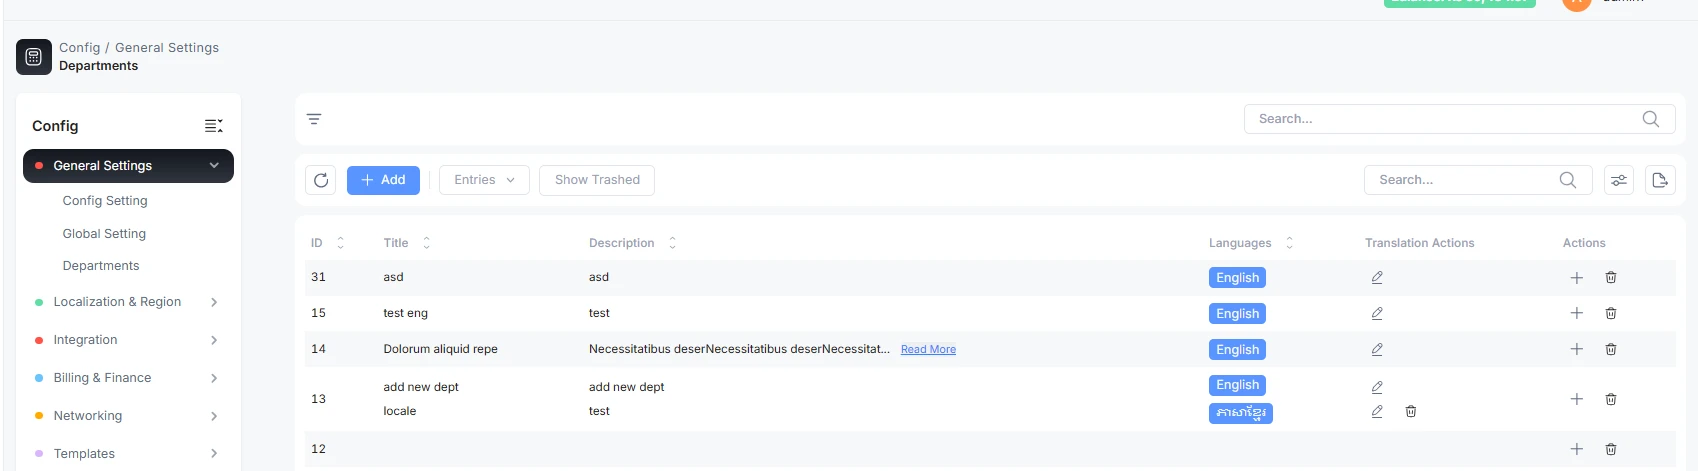
The ISP can easily add departments here in the “config settings” to separate their operations. The platform offers a seamless operational flow between technical, financial, and sales teams.
Roles can be created based on departments. The structural foundation allows ISPs to have full access control. The permission and functions will only be accessible to a particular department. This ensures that sensitive network configurations and financial data are accessible to authorized personnel only.
The software transforms a messy workspace into a scalable and high-performance environment. This creates clarity about every task that owns and workflow for optimized growth.
Add department:
Click on the Add button. Enter the title and description of the department.
Localization and Region
The ISP can customize the software by adding countries, regions and languages for their native users. Not all workers are proficient in the English language. Therefore, we have added this option to support multiple languages. Every worker with a different intellectual level can use the software easily.
1-Countries
We have provided the list of all famous countries to be used during branch creation. We have listed almost all the countries' names. You can add more with the add button.
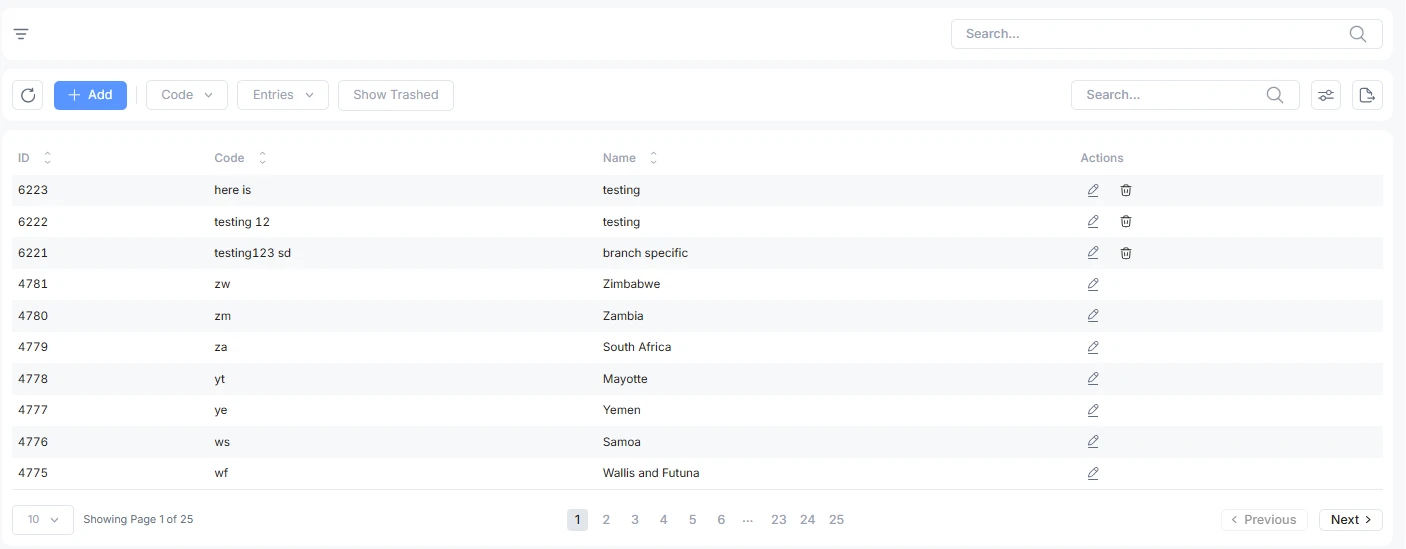
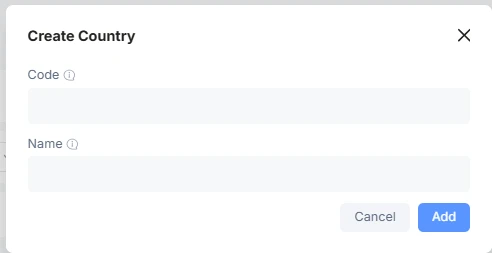
To add a new country
-
Enter country name
-
ISO code of that country
2- State Provinces
Here, you can add Provinces or State names of the country. You can add a short code name for it. You can also edit the mentioned province name.
Even some filters are also provided to find if the province is in the list.
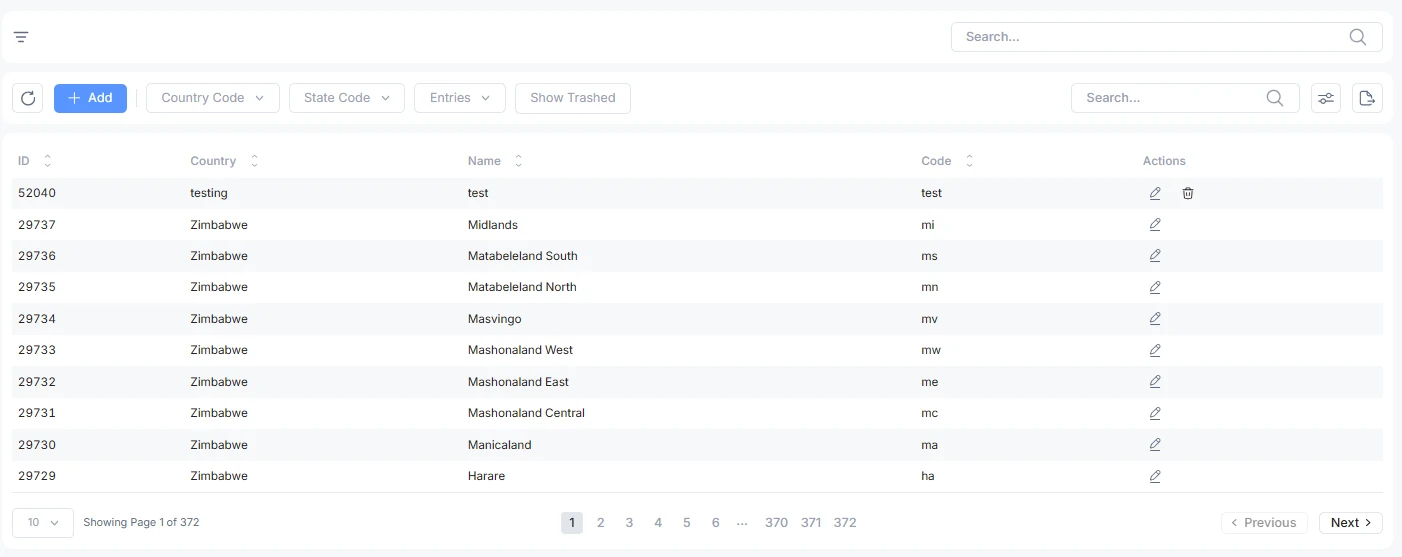
You can search for the country name with the country code. Like the UAE, it will show the states of the UAE. If a state is not mentioned here, you can manually add it.
3- Languages
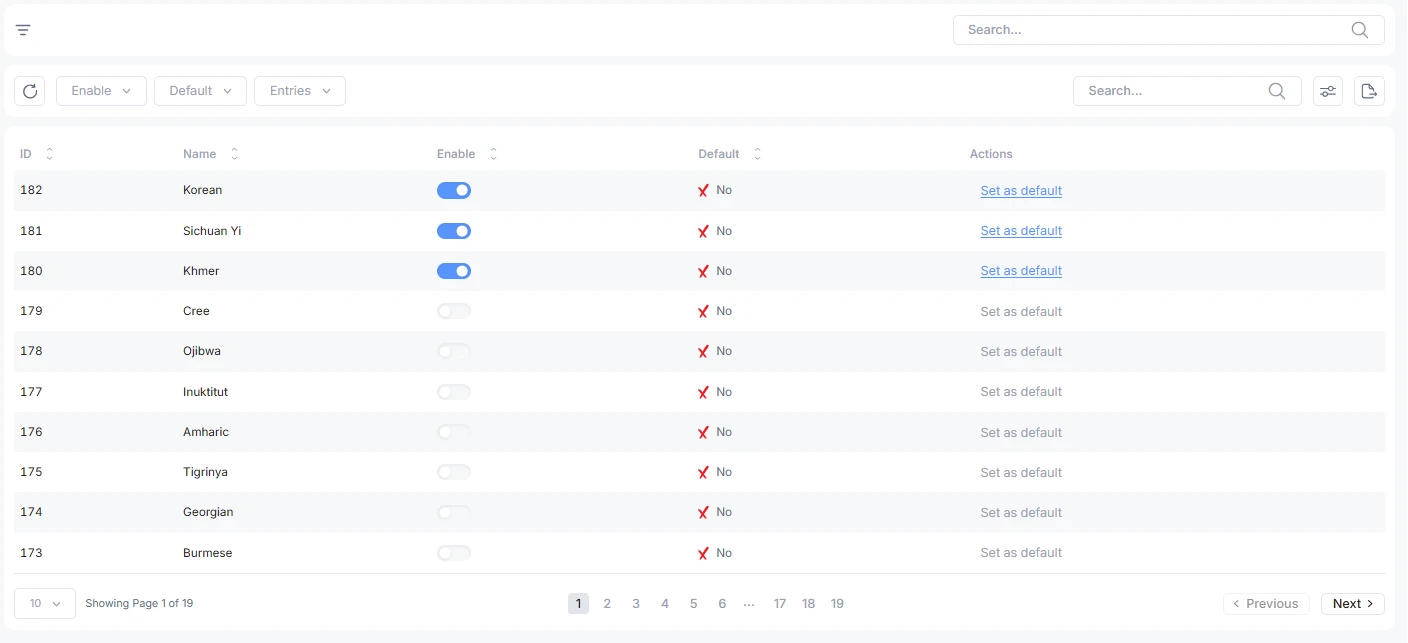
There are a total of 181 languages in the system. You can enable languages to use in the system. English is set as the default. To find any language type in the search bar and click the search icon.
Integrations
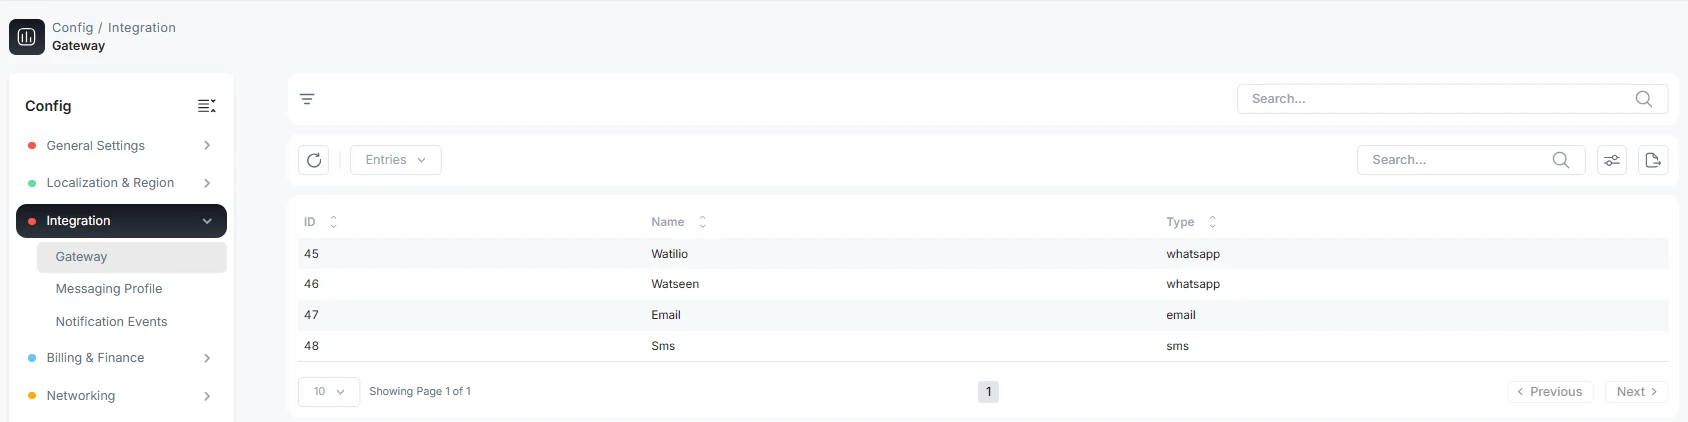
The system shows what kind of APIs we are using for notification events. For sms, email and WhatsApp. Further, we have three lists to see details regarding the notification.
1-Gateway
It shows a list of gateway software used to communicate with customers
2-Messaging Profile
These are the list of messaging profiles. A partner can send by default messages to their customer about plan updates, service activation, etc. An admin can add them for a particular partner. If there is no fixed partner, the profile is made for branches. A branch can use default templates specific to Email, SMS and WhatsApp. A profile creation here is a must to be used in notification events.
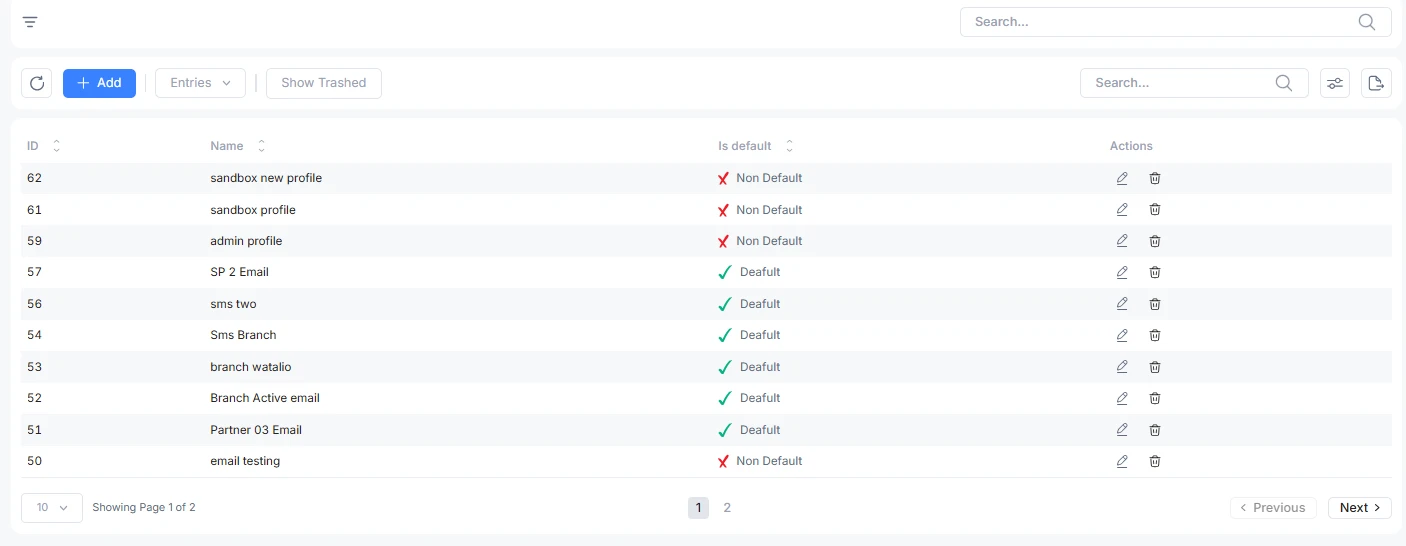
Create a new message profile
Click on the Add button, fill in all the fields
Providers: Watilio and Watseen for WhatsApp, SMS, email, three types of communication services you can provide to partners or branches for bulk SMS and personalized messaging.
As you click on the provider, extra fields will appear provided by a third-party app. Fill them accordingly
Name: The service name
Is default: Click on for msg profile use
Partners: Select a partner for a specific person's messaging; it will be the branch message profile
3-Notification Events
These are the system-defined messages for WhatsApp, email and SMS for notifying customers and partners in different situations.
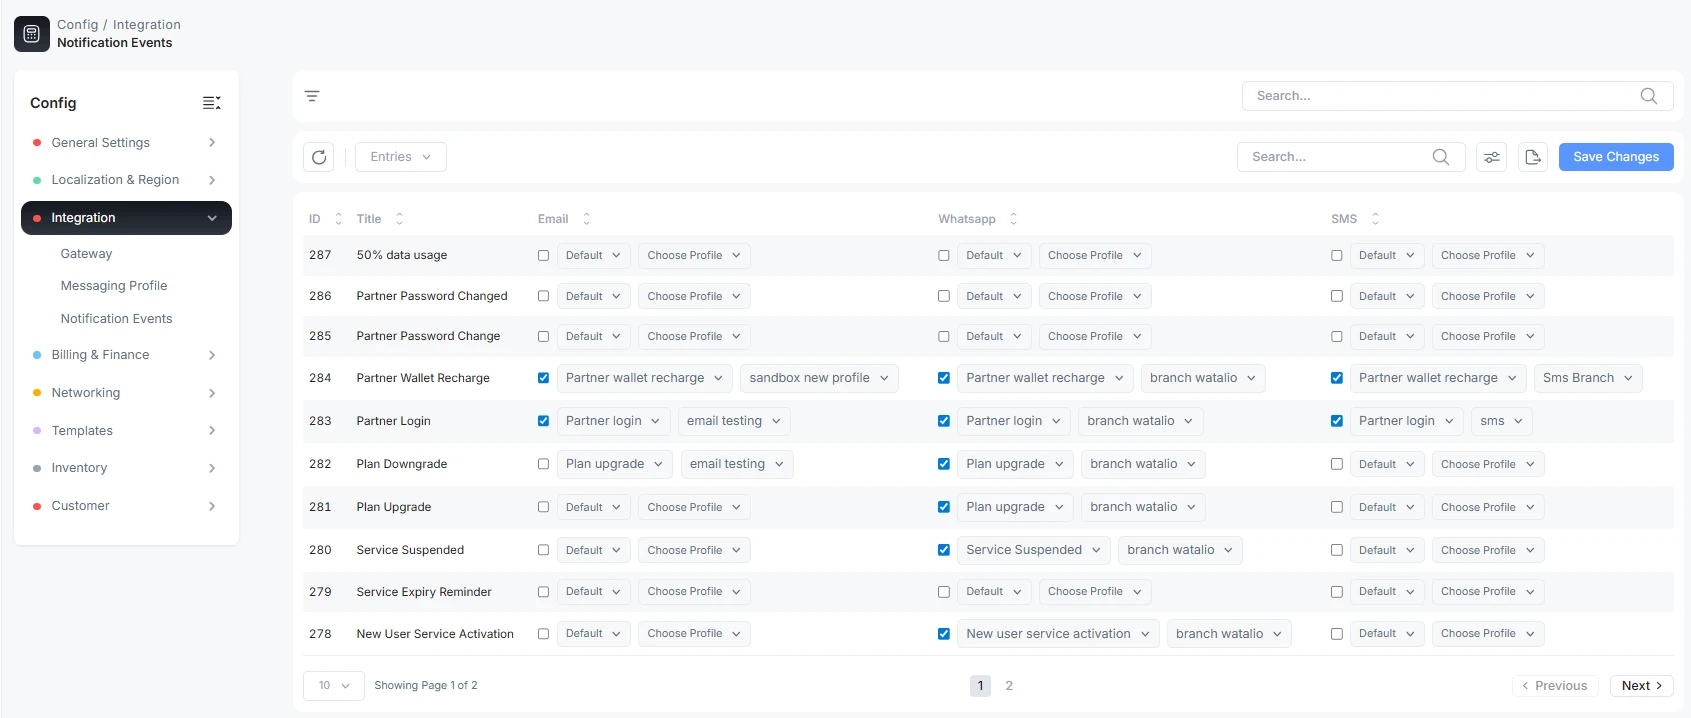
Click on WhatsApp, email, sms template to be used. Now, click on choose profile to activate the message service for a particular message profile. Save changes.
To use these templates, a message profile is a must-have.
Billing and Finances
In the billing and finance section, you can add taxes and payment modes and payment account-related information. We provide four options further
1-Taxes
Here, you can add tax according to type. Either in a separate form or a group form. These taxes can be used in software to specify the type of tax.
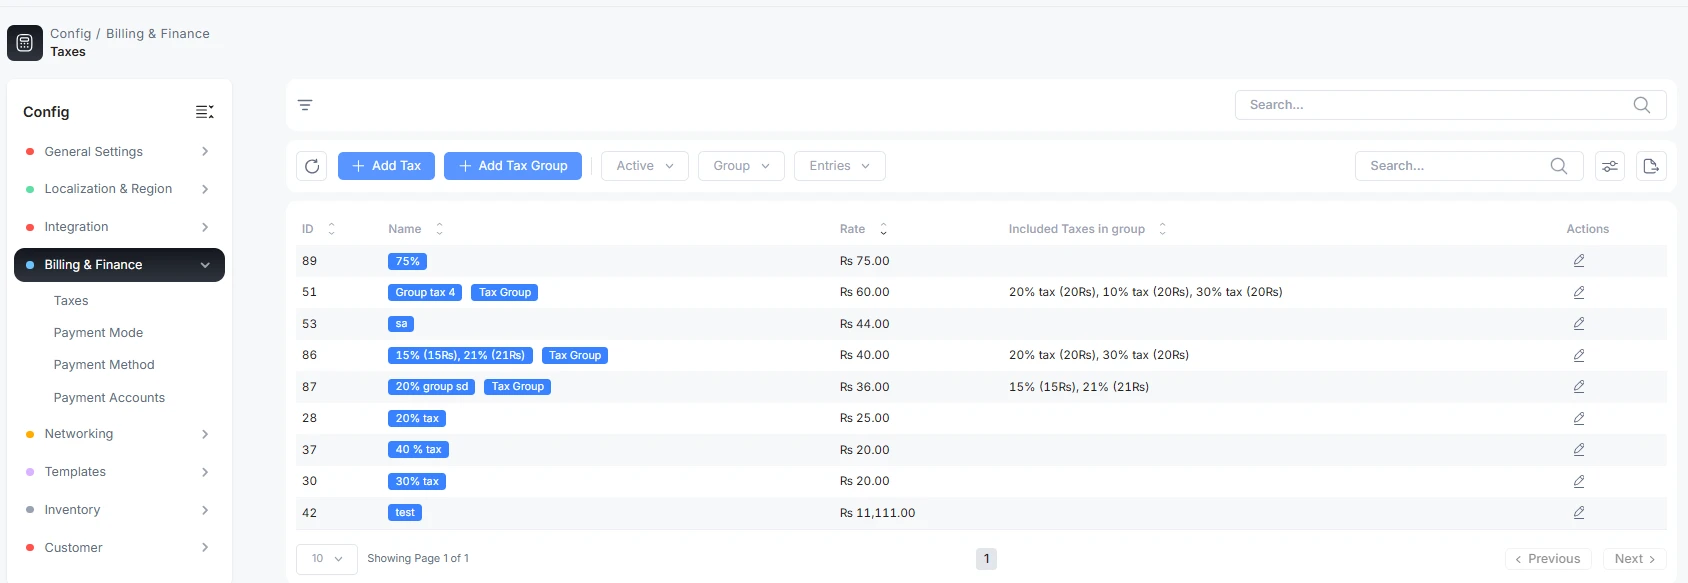
For a single tax, click on add tax, type the title name of tax and its rate.
A group tax can be applied to a particular tariff plan or to any inventory. To define a group tax, click on add tax group. Add the name of the group tax. Apply the tax percentage and the amount on which it is applicable. Click on Add to complete the step. For example: Standard Internet tax group: Includes bundle VAT (15%) and Infrastructure Cess (1%)
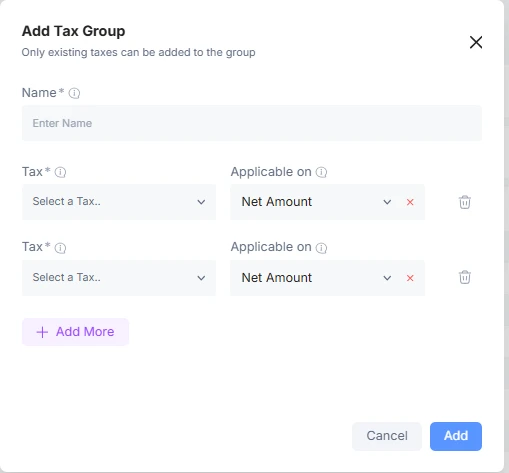
Search: A search option is available to find a tax or tax group. You can check if it is already listed or not.
2-Payment Mode
Here, the admin can add a payment type to the list. The payment type added here will be used in creating a payment method.
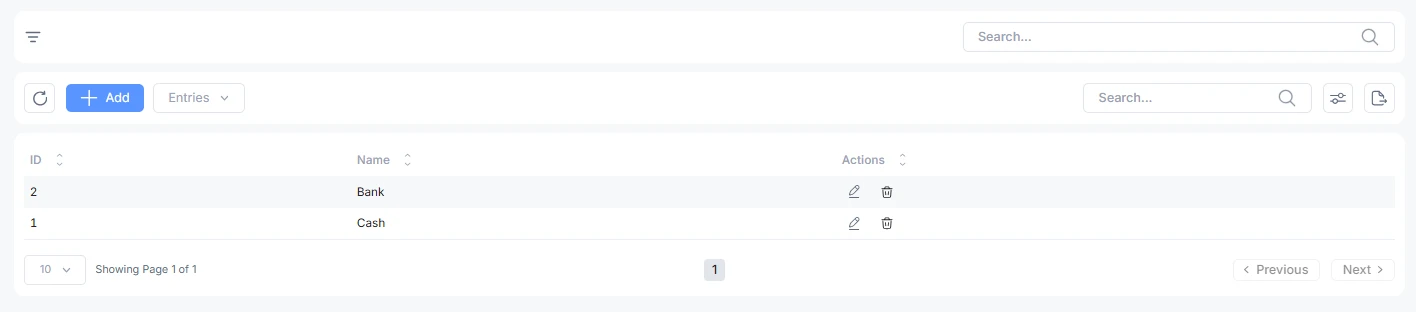
3- Payment Method
This section defines payment methods such as Mobile Money, Apple Pay, PayPal, cash-based voucher, etc.
To add a new payment method, click on add button and fill in all the fields. Save to add.
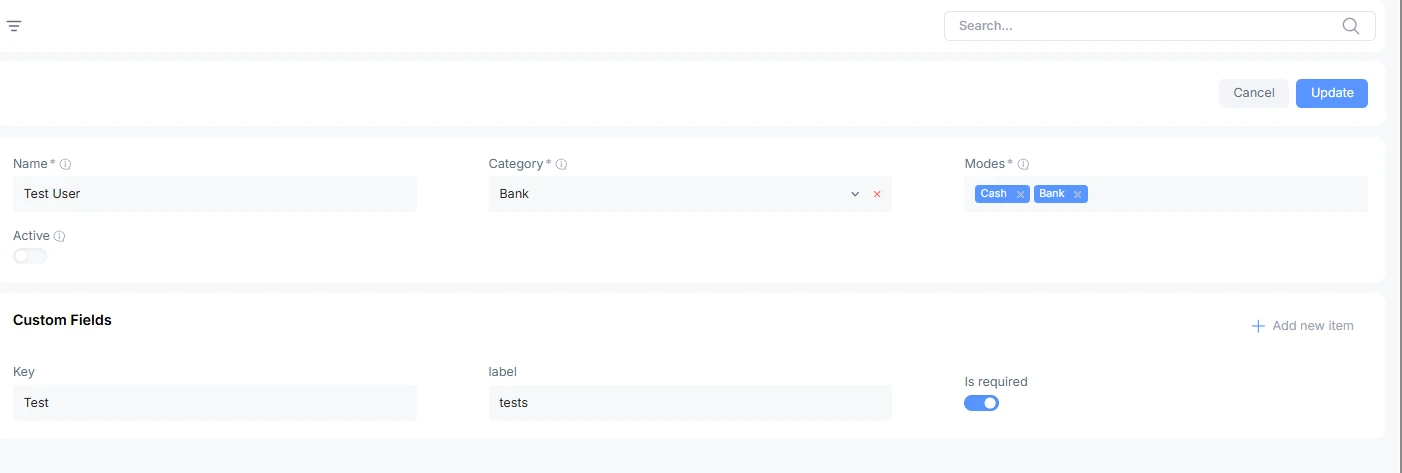
Name: the descriptive name of the payment
Category: bank, cash, e-wallet, which was defined in the payment mode
Modes: You can select single or multiple modes for this type of payment. You can both add cash, bank transfer.
Active button: if it is not enabled, the user cannot see it
Custom Fields
Key: specific information from the bank or the external payment gateway
Label: the name shown in the system in the payment account list
Is required: this button activation will appear in the payment account field
4- Payment Account
On clicking the payment account, a list of payment account appears against the partner or the branch.
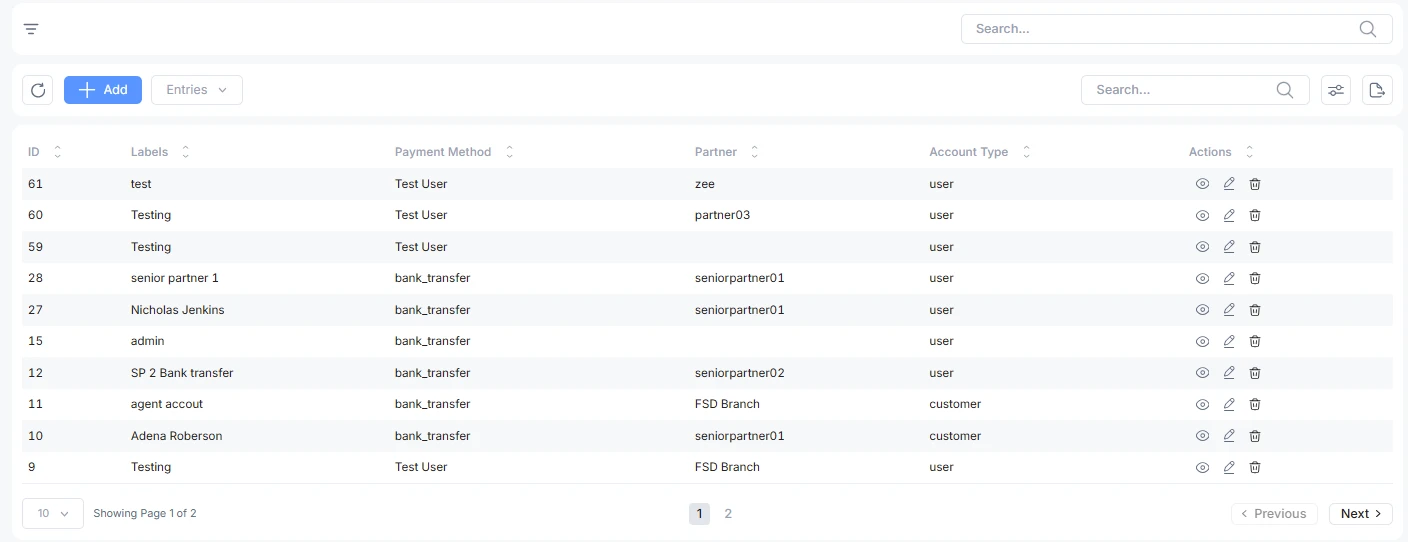
To add a new account, click on the add button and fill in the required field.
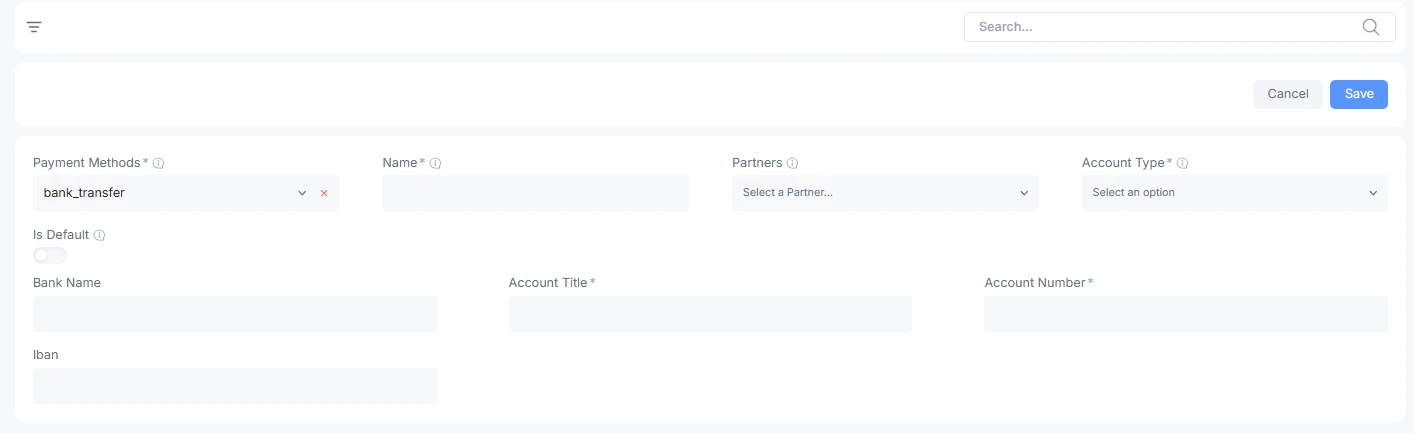
Payment Methods: the type of payment method is selected from drop down list
Name: the descriptive name of the account
Partners: the partner to whom the balance account is made; if a partner is not selected, branch account is created.
Account type: user or customer, the type of account used for
Other Information:
Bank Name: the name of the bank in which the partner or user account is created
Account Title: the title of the bank account
Account Number: bank account number
IBAN: bank provided information
Networking
This shows a list of networks defined for the company's ease. The IPs under a certain category have to be used for a particular purpose.
1- IP Network Category
This represents a network category. To add a new category, click on add button. Category defined here will be used in the Router IPv4 section.
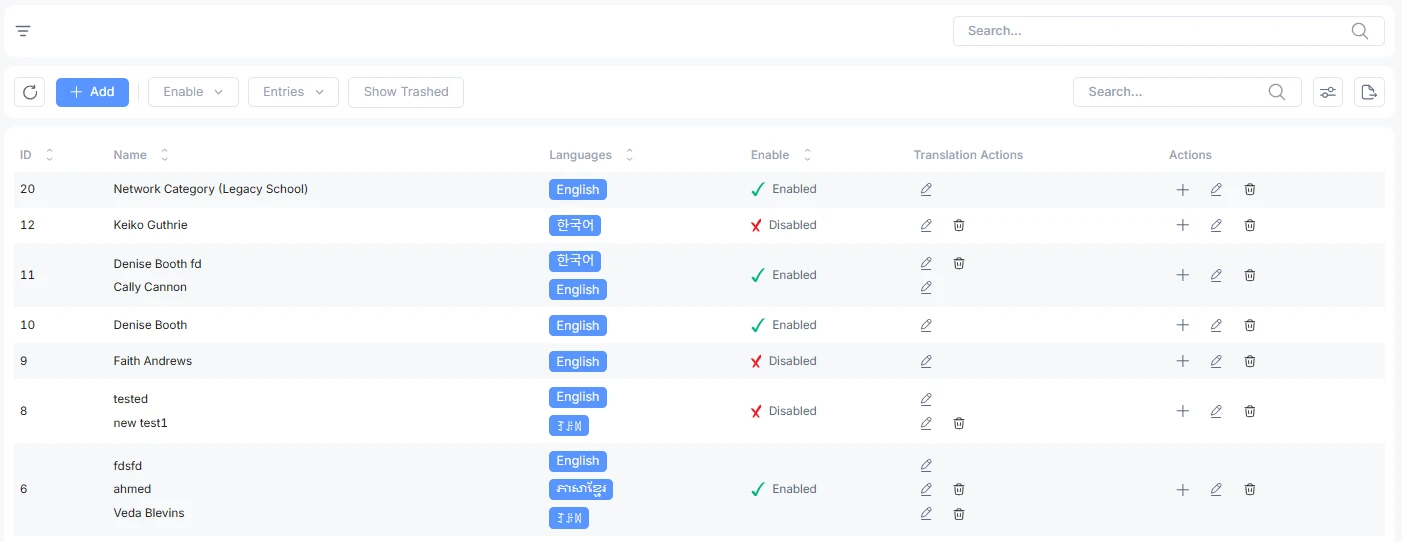
You can edit the already defined network and delete the network here as well.
2- IP Host Category
Even the IP host category can be defined. Here, which is used further in the system.
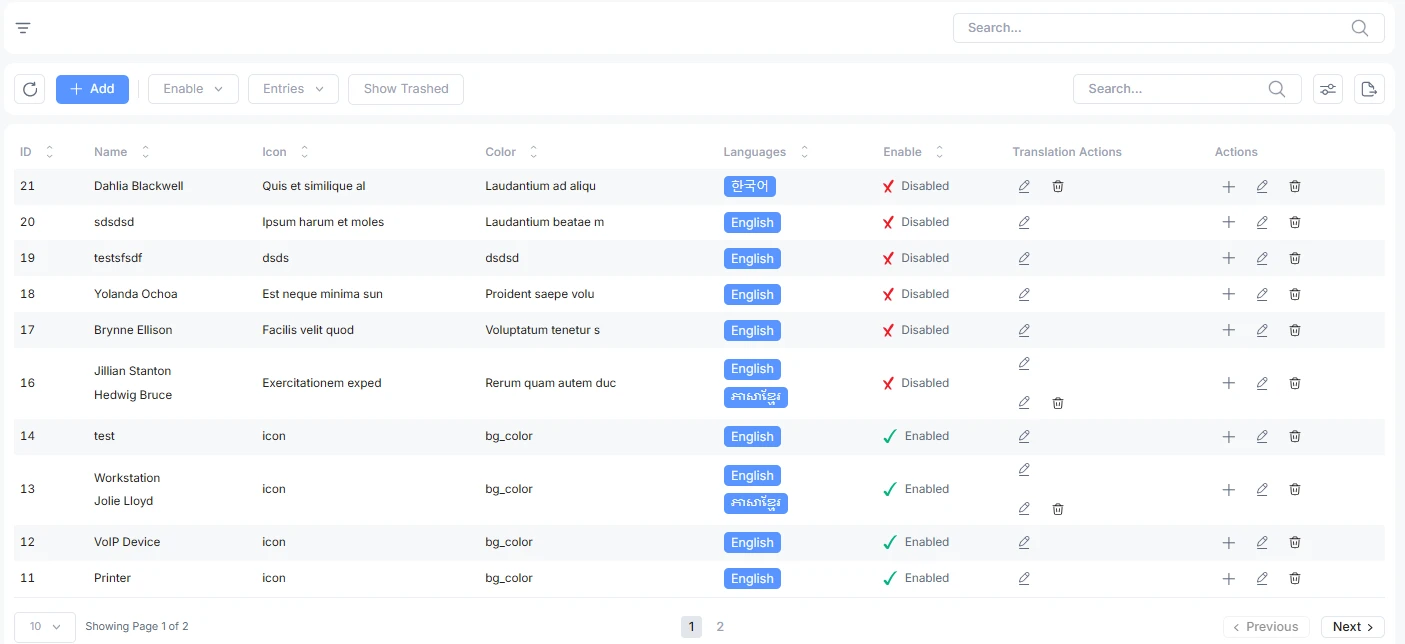
To add an IP Host Category. Click on the Add button. Fill the IP Host Category to define a new IP host.
Templates
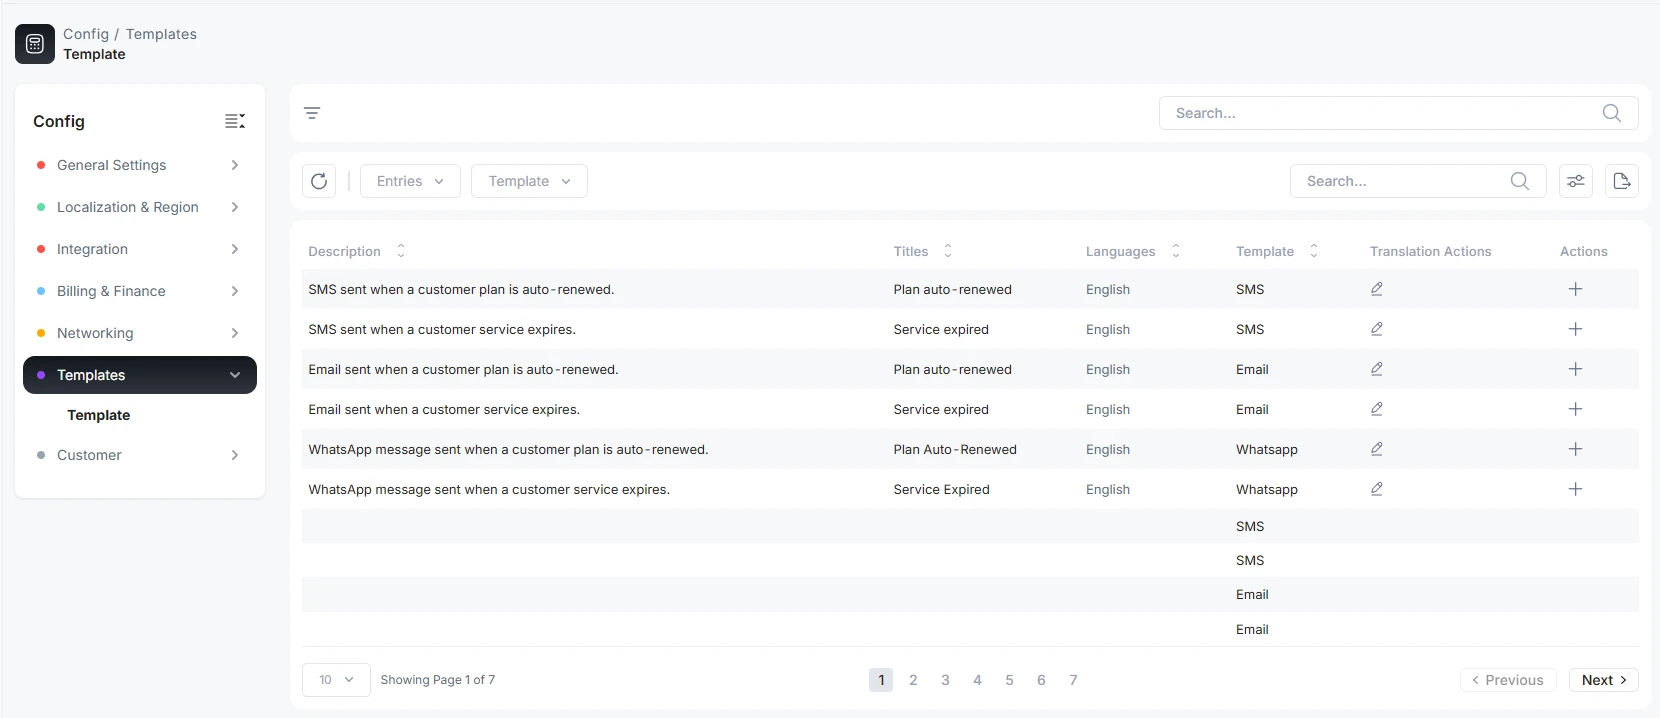
Here, you can see what type of templates are available in the system. ALT Radius provides a built-in template for email, sms, WhatsApp, invoice and PDF download templates.
Customer
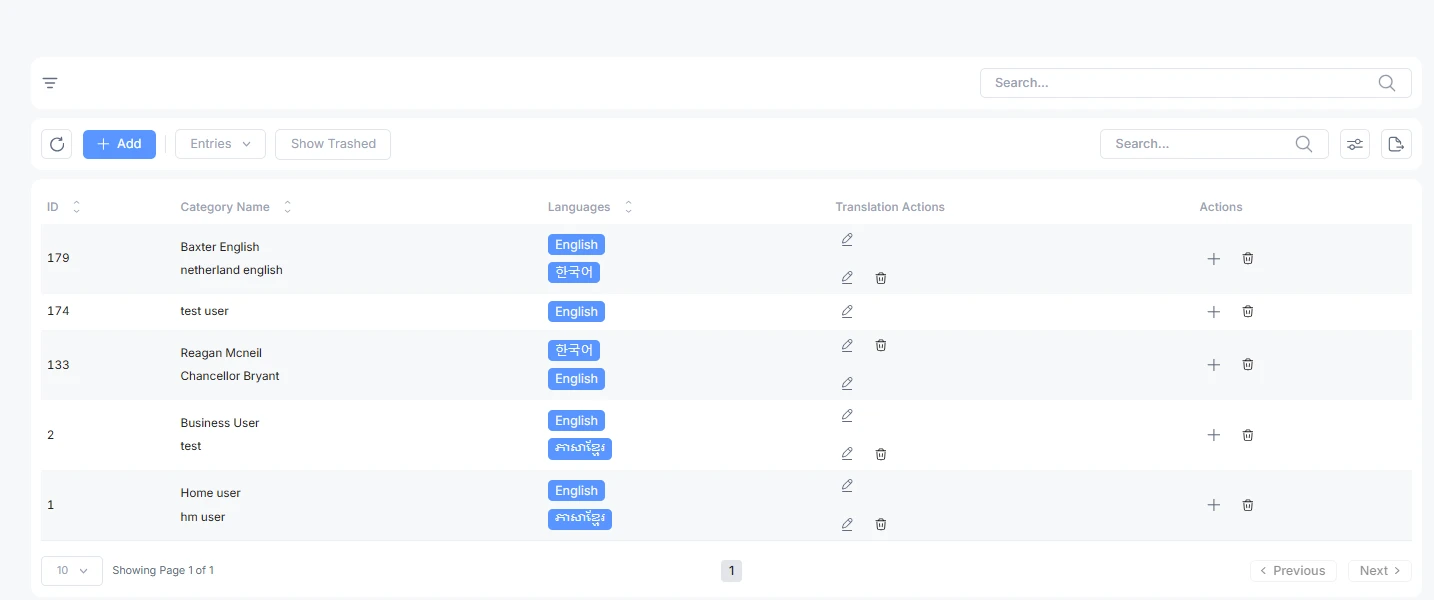
It is a customer category; admin can define here. This option lets user to categorize customers into different ones. This option in the list is used while creating a new customer.
Customer category
You can easily add a new customer category with the Add option. You can even add a category name when another language is selected. Changing the language of the main admin panel will display the name in the selected language. These translation features make ALT Radius Multilingual.